After deciding to focus on the windowfarms company I started anaysing their buildguide
- The simple design is easy to follow but very text heavy and not very engaging.
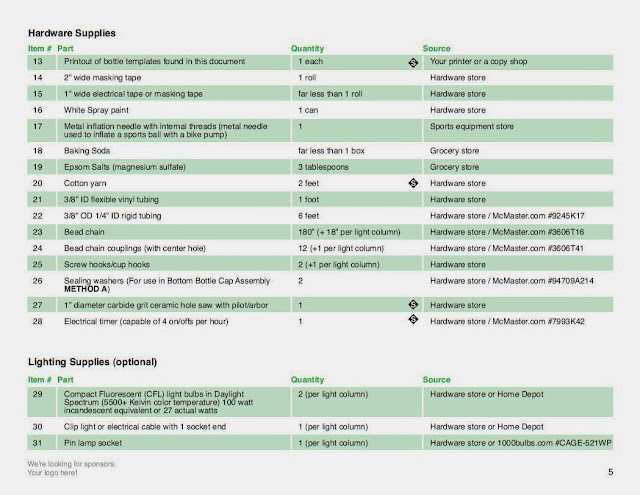
- The only recycled parts that the guide lists are the plastic bottles.
- In the footnotes the guide lists how certain parts can be made from recycled materials rather than bought from a hardware store, this information is directly relevant to my project as I am promoting the DIY, sustainable version of the Windowfarms product.
BOTTLE CUTTING TEMPLATES
The bottle cutting temples are used to help users accurately cut the holes into the plant and reservoir bottles. As my guide aims to direct the accurate construction of a Windowfarm the cutting guides will need to included in my final outcome.
- The templates provide the audience with simple graphic illustrations that help to instruct the user so that they can effectively utilise the template.
STEP 1 - BOTTLE COVERING
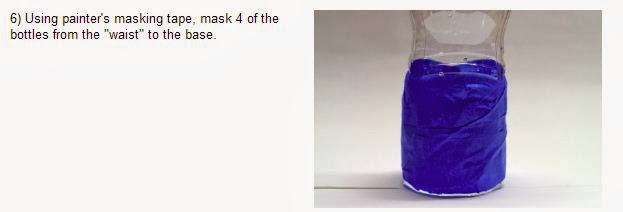
The first step of the process involves the preparation and covering of the plant bottles.
The first step of the process involves the preparation and covering of the plant bottles.
- Instructions will be illustrated to visually support information making it quick and easy for users to understand and digest.
- The guide will include additional options for members of the audience without access to a power-drill.
STEP 3 - RESERVOIR BOTTLE
STEP 4 - SUSPENSION SYSTEM
- The guide outlines how additional materials such as string can be used to create the suspension system instead. My guide will promote the most sustainable version of the system and therefore will instruct users to utilise string instead of the plastic bead chain.
STEP 5 - MOUNTING & INSTALLATION
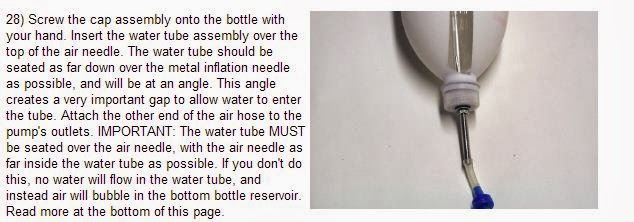
STEP 6 - PLUMBING SYSTEM
There are two versions of the plumbing system available, each is applied for the varying aspects and dimensions of specific pieces of equipment. As I am working to a very tight time-scale I will include only one of the variations, however reference a link to the website where the others will be displayed.
Method two
STEP 7 - ADDING LIGHTS
Lights are only needed if the Windowfarm receives less that four hours of natural light a day.
STEP 8 - ADDING PLANTS
Finally, angle the plant and net cup and carefully slide the elements into one of the empty plant bottles. When selecting plants for your Windowfarm remember to refer to the grow guide as certain plants will prevent each other from growing.
STEP 9 - FULL ASSEMBLY
STEP 10 - MAINTENANCE
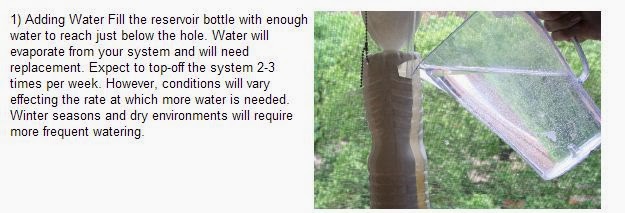
- When filling the reservoir bottle add just enough water to reach just below the bottles opening. Water will naturally evaporate from your system and will need replacing, so expect to top up the system around 2-3 times a week.
- Use the dial located on top of the air pump to control the flow rate of water through your Windowfarm system. The flow should be just enough to crate a steady drip of water throughout the system. If the flow is too high excess power will be used and extra noise created. On the other hand, a flow that is too weak will create wilted plants.
- When initially setting your timer use the standardized interval of 15minutes. Observe how your plants reacts and adjust the frequency of the timer accordingly. If unsure as to how to adjust the timer to benefit your plants refer to the growing guide.
- Manual pollination can be done using a small paint brush to move pollen from one plant to another, mimicking the actions of a bee.
- The tubes of the windowfarm will slowly accumulate algae growth on the inner walls of the bottles and pipes. Although not directly harmful to plants algae can reduce the water flow efficiency.
- You can clean the pipes by making a D.I.Y pipe cleaner, and all you need is a length of the hemp string provided in the pack.
- Start by cutting one 30 inch (76cm) piece of string, an 18 inch (46cm) piece and a smaller 4 inch (10cm) piece.
- Next, Loop the smaller piece of string back and fourth in 3 inch loops until the length is completely used up. Then, secure the loops by using the 4 inch length of string to double knot around the centre of the string bundle.
VERSION 2 - Standing bottle windowfarm.
The standing bottle windowfarm is suitable for users who have less window space, or who want to experiment with a small version before committing to the bigger, harder to build D.I.Y version 3. The smaller version requires less materials and tools and can be built in an hour, making it perfect for other members of my audience who perhaps have less time/space to invest in a windowfarms project.
As the version 2 windowfarm shares a lot of similarities with version 3 some steps of the build process are almost identical.
As the version 2 windowfarm shares a lot of similarities with version 3 some steps of the build process are almost identical.
- The first page of the construction manual gives an introduction to the version and lists the materials that are needed for its production.
- Steps one and two are covered in an identical manor in the version 3 build guide. However, a drill is used instead of a scalpel to remove the holes from the bottom of each bottle, this will save time and create a cleaner outcome but means the audience have to buy or rent expensive tools.
- Steps three to five are also covered in an almost identical manor the version three build guide.


No comments:
Post a Comment